MicroFrontends with Vue

Microservices are a well known concept nowadays. Handling encapsulated logic in different applications, can be a nice fit for bigger teams to avoid problems in deployments and development speed. Most of the time though, people are talking about the backend, where the UI part to some extend stays as a black box. One of the solutions to also further break down the UI is the concept of microfrontends which we will further explore here.

There are obviously also other ways to solve issues (I can highly recommend reading Sam Newmans awesome book on this https://samnewman.io/books/building_microservices_2nd_edition/ ), but one way to decompose your UI might be as following.

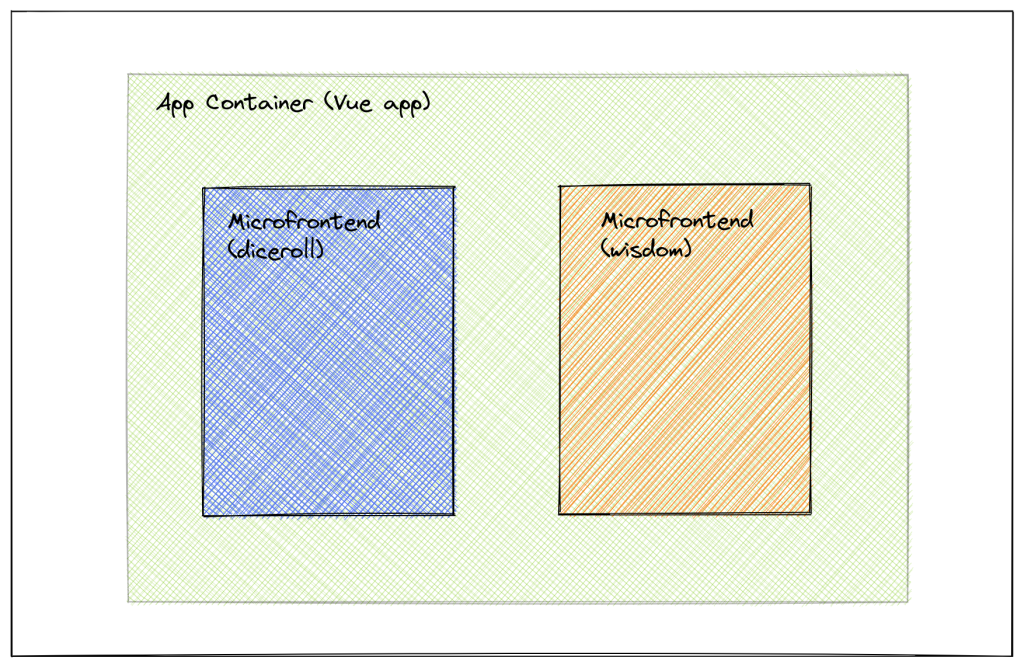
Each service not only contains the backend logic which then gets called the from one service to render the UI, but rather each service comes with its own UI which then gets loaded into an application which keeps an overview of all the systems to load. This allows us to deploy the full service UI and backend on its own without the need to deploy one big system for each change. This avoids keeping two systems too much in sync in terms of deployments.
Basic structure

In order to do this I used a vue js setup, where we have one container app, which further loads asynchronously applications into the main container (this is heavily inspired by https://blog.bitsrc.io/how-to-develop-microfrontends-using-react-step-by-step-guide-47ebb479cacd
flow of data

To achieve this one component was written:

<template>
  <div :id="this.containerName()" />
</template>

<script>
//utility function to generate a uuid (I didn't wanted to import the uuid
//lib just for a random string
function uuidv4() {
  return ([1e7]+-1e3+-4e3+-8e3+-1e11).replace(/[018]/g, c =>
      (c ^ crypto.getRandomValues(new Uint8Array(1))[0] & 15 >> c / 4).toString(16)
  );
}
export default {
  name: "MicroFrontend",
  props: {
    // name of the microfrontend like `wisdom` or `dicreoll`
    name: {
      type: String,
      required: true
    },
    // host where the script should be loaded from
    host: {
      type: String,
      required: true
    },
    // define a static container name rather than a generic one
    // not needed if you are ok with random divs all the time
    staticContainerName: {
      type: String,
      required: false,
      default: null
    }
  },
  data: function () {
    return {
      uuid: uuidv4()
    }
  },
  methods: {
    // calculates the container id we load the microfrontend app into
    containerName() {
      if(this.staticContainerName != null) {
        return this.staticContainerName;
      }
      return `${ this.name }-${this.uuid}-container`;
    }
  },
  mounted() {//
    // id is generated by frontend - this will avoid loading the same
    // script twice
    const scriptId = `micro-frontend-script-${this.name}`;
    const renderMicroFrontend = () => {
      const fnName = `render${this.name}`;
      const containerName = `#${this.containerName()}`;
      //load the render function per convention and handover the container id
      window[fnName](containerName);
    };
    if (document.getElementById(scriptId)) {
      renderMicroFrontend();
      return;
    }
    //first load the manifest.json this contains the way forward
    fetch(`${this.host}/manifest.json`)
        .then((res) => res.json())
        .then((manifest) => {
          const script = document.createElement("script");
          script.id = scriptId;
          
          script.crossOrigin = "";
          //load out the path to the main.js file
          script.src = `${this.host}/${manifest["src/main.js"]["file"]}`;
          script.onload = () => {
            // call the function defined on top which will resolve then the app
            renderMicroFrontend();
          };
          document.head.appendChild(script);
        });
  }
};
</script>

<style scoped>
</style>

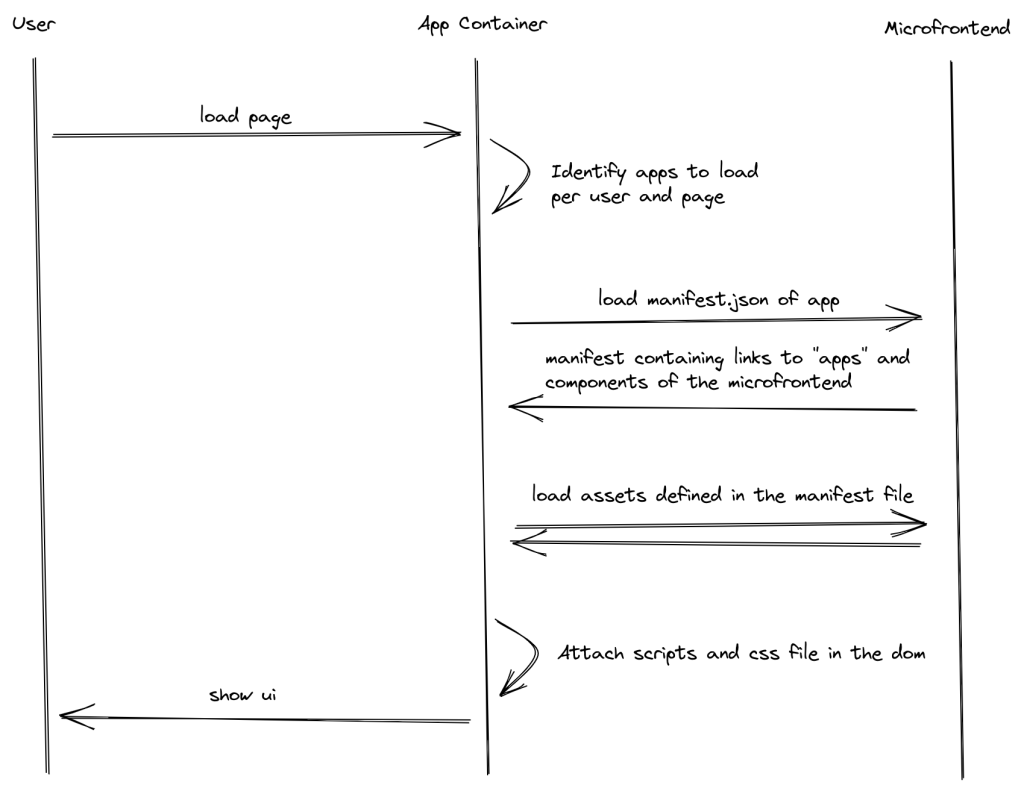
At the mounted stage we will trigger a check and if necessary a load of the corresponding script files.

Each script is ensured to be loaded only once, where the script id is the identifier here. Each microfrontend must follow a convention here and offer in its own application a function called render<name> (e.g. renderDiceRoll ). The manifest json must per convention offer a file with src/main.js which consists of the render functions. The script is than attached to the document header section so that it can be loaded. Afterwards the function is called, which calls the actual render function of the microfrontend app.

Calling one microfrontend is than as simple as including this in the main container.

<vue-micro-frontend name="diceroll" host="http://localhost:8000"/>

The full sample can be found here https://github.com/zelle7/vue3_microfrontend_poc
Not solved here

Things which are left out here:

  • Authentication
  • Communication between services
  • Different technologies (like loading vue3 and vue2 or even things like react)

Links

Playing around with tkinter

A nice tool I’ve found recently using python and tkinter is pygubu-designer. (used for a playing around with python project – https://github.com/zelle7/websocketocppgui)

A typical gui, even the simple ones like those which are build with tkinter come to a point where it become quite cumbersome generating all the variables and/or properties which define the elements in the gui. At least for me, it is getting confusing quite fast and you have a lot of starting and stopping the application, to see if your updates have been successful. The pygubu-designer comes with some a simple gui which allows you to drag in th elements you need. In addition to that you can configure various things (from visual stuff up to click handler functions).

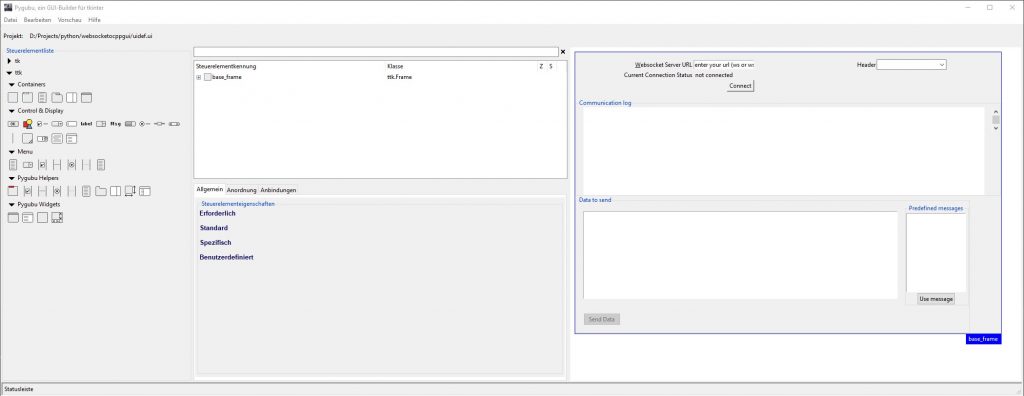
You can install the package via pip(package pygubu https://pypi.org/project/pygubu/ ), and start in the commandline with pygubu-designer.The gui looks like this:

The left part is the configuration part and the right things you see is a preview of the app and how it will look like. The tool itself is generating an ui-file which is just a file with xml content.

One thing which was a little bit confusing at the beginning: There is no way to just drop existing elements into others. e.g. drag an existing label into a frame. As a workaround you can cut the elements and paste them into the wanted containers. Another thing is that you can move elements up, down, left, right with ALT + (I|K|J|L).

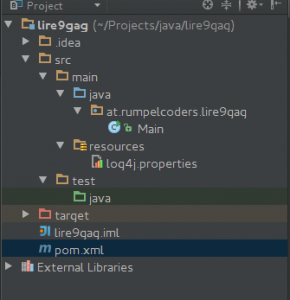
Maven Basis Struktur für ein Executable Jar File mit Dependencies

Um ein executeble jar File mit maven zu erstellen, wird folgendes xml benötigt.


<?xml version="1.0" encoding="UTF-8"?>
<project xmlns="http://maven.apache.org/POM/4.0.0"
         xmlns:xsi="http://www.w3.org/2001/XMLSchema-instance"
         xsi:schemaLocation="http://maven.apache.org/POM/4.0.0 http://maven.apache.org/xsd/maven-4.0.0.xsd">
    <modelVersion>4.0.0</modelVersion>

    <groupId>lire9gag</groupId>
    <artifactId>at.rumpelcoders.lire9gag</artifactId>
    <version>1.0-SNAPSHOT</version>

    <!-- Output to jar format -->
    <packaging>jar</packaging>

    <properties>
        <jdk.version>1.8</jdk.version>
        <junit.version>4.11</junit.version>
        <log4j.version>1.2.17</log4j.version>
        <maven.compiler.plugin.version>3.1</maven.compiler.plugin.version>
    </properties>

    <dependencies>
        <dependency>
            <groupId>junit</groupId>
            <artifactId>junit</artifactId>
            <version>${junit.version}</version>
            <scope>test</scope>
        </dependency>
        <dependency>
            <groupId>log4j</groupId>
            <artifactId>log4j</artifactId>
            <version>${log4j.version}</version>
        </dependency>
    </dependencies>

    <build>
        <finalName>lire9gag</finalName>
        <plugins>
            <!-- Set a JDK compiler level -->
            <plugin>
                <groupId>org.apache.maven.plugins</groupId>
                <artifactId>maven-compiler-plugin</artifactId>
                <version>${maven.compiler.plugin.version}</version>
                <configuration>
                    <source>${jdk.version}</source>
                    <target>${jdk.version}</target>
                </configuration>
            </plugin>

            <!-- Make this jar executable -->
            <plugin>
                <groupId>org.apache.maven.plugins</groupId>
                <artifactId>maven-jar-plugin</artifactId>
                <configuration>
                    <!-- comment in to DO NOT include log4j.properties file in your Jar
                    <excludes>
                        <exclude>**/log4j.properties</exclude>
                    </excludes>
                    -->
                    <archive>
                        <manifest>
                            <!-- Jar file entry point -->
                            <mainClass>at.rumpelcoders.lire9gag.Main</mainClass>
                        </manifest>
                    </archive>
                </configuration>
            </plugin>

        </plugins>
    </build>

</project>

Es wurde hier zusätzlich log4j und junit eingefügt da diese oft gebraucht werden.

Sollte folgender Fehler auftreten:


[ERROR] BUILD ERROR
[INFO] ------------------------------------------------------------------------
[INFO] Fatal error compiling

Embedded error: invalid target release: 1.8
[INFO] ------------------------------------------------------------------------
Selection_008
Prüft die JAVA_HOME Variable [code]echo $JAVA_HOME[/code] auf die entsprechende Java Version eingestellt ist.

Das jar-File kann anschließend unter „target/groupId.jar“ gefunden werden

Hilfreiche Links:

Scroll to top